An assignment is a task or responsibility allocated to a resource within a project. It details the specific actions to be taken, by whom, and the timeframe in which they should be completed to accomplish project goals effectively.
Before creating an assignment, make sure the person or role you are assigning it to has been added to the Schedule.
Note: This functionality is only available for Resource Managers, Administrators and Owners.
Step 1: Find Resource from Side Menu or Schedule Calendar
Side Menu
- From the Projects or People views of the Schedule page, hover your cursor over an item in the list of resources, or tap the row if using a mobile device. The row color changes to indicate the assignment you are selecting.
- When the floating action icons display, select the
 Add icon and select Assignment from the drop-down list.
The New Assignment dialog opens with one or more fields pre-filled based on where you were on the page when you launched the dialog.
Schedule Calendar
- Alternatively, drag across an empty space on the Schedule Calendar to open the New Assignment dialog with the Dates, Percent and Hours fields pre-filled as well.
Tip: Users on a device without a mouse can long press and drag left or right on the right side of the Schedule page to create an assignment.

Step 2: Complete Fields
Complete the following fields to create an assignment.
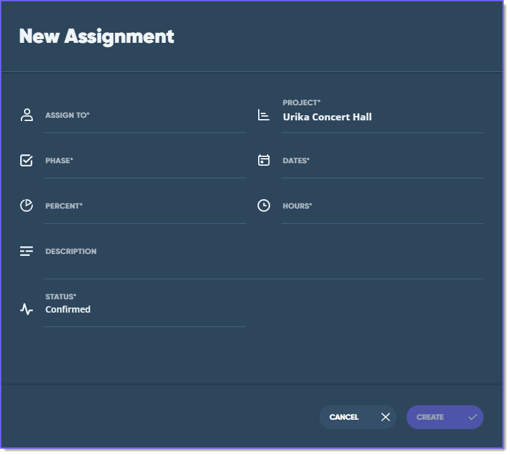
- Select the person or role responsible for the work from the Assigned To drop-down list. If you accessed the dialog from the People view, this field is pre-filled with the name of the person or role that was highlighted when you opened the dialog.
- Select the project the assignment should be associated with from the Project drop-down list. If you created the assignment from the Projects view, this field is pre-filled with the name of the project that was highlighted when you opened the dialog.
- Select the phase you are assigning the person or role to from the Phase drop-down list. If you created the assignment from the phase-level, this field is pre-filled with the name of the phase that was highlighted when you opened the dialog.
- Only phases assigned to the selected project display.
- Select the Date Range for the assignment with the calendar that displays when select this field. To select a date or date range, first select the start date, then select the end date.
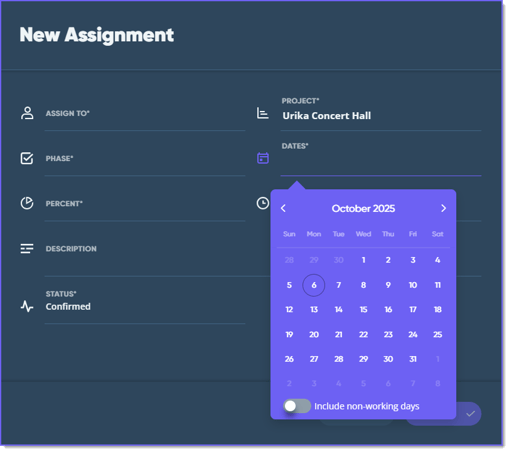
- If you dragged across an empty space on the Schedule Calendar, this field is pre-filled with the dates included in the selection area.
- At the bottom of the calendar, you can select to include non-working days (e.g., weekends or other days defined in the working calendar) in the date range.
- The maximum duration of an assignment is (5) five years.
- Enter the percentage of the person or role's time that should be allocated to this new assignment in the Percent field or enter the hours the resource is allocated for in the Hours field.
- The Percent and Hours fields are connected. Entering a value in one field automatically updates the value in the other. Select one or the other to update, not both.
- For example, if the default is 8 work hours a day and you enter 50%, the resource is scheduled for 4 hours each day.
- Enter a description for the assignment in the Description field.
- Select Confirmed or Tentative from the Status drop-down list. For example, if the default is 8 work hours a day and you enter 50%, the resource is scheduled for 4 hours each day.
- See Setting the Assignment Status for more information.
Step 4: Create and Save
Select Create when complete to save or Cancel to close the dialog without saving..
See Also:
Adding a Project to a Resource